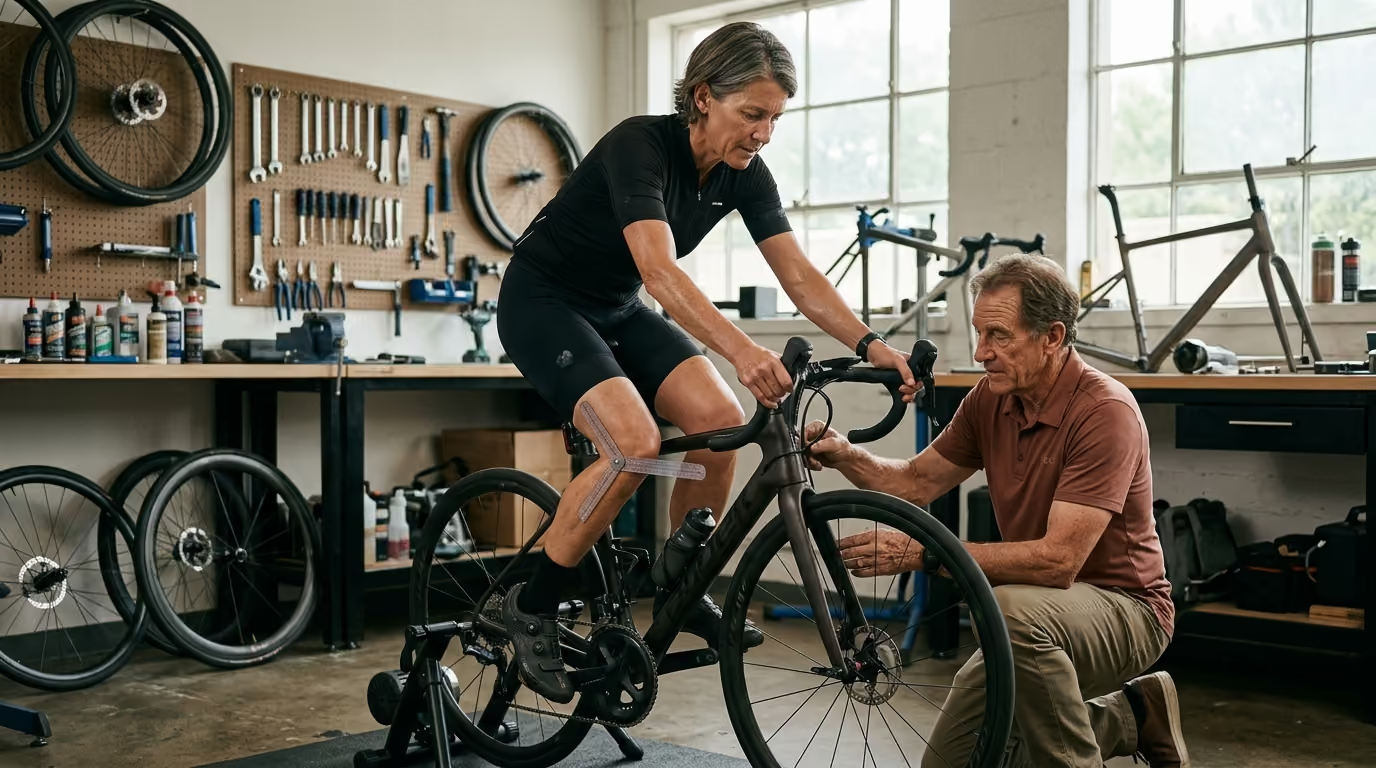

Proper bike fit reduces overuse injury risk by aligning saddle, pedal, and handlebar setups to protect joints and improve endurance cycling performance.





You are forty miles into a four-hour weekend ride when a familiar tightness begins beneath your right kneecap. By mile fifty, the dull ache shifts into a sharp pinch every time you push over the top of the pedal stroke. You pull over to the side of the road, loosen your seatpost clamp, and raise your saddle by five millimeters based on advice you read on an internet forum. Two days later, your knee feels slightly better during an easy spin. However, your lower back aches, your left Achilles tendon feels strained, and your hands go numb within twenty minutes of holding the brake hoods.
This cycle of trial, error, and shifting discomfort is common among endurance riders. When a joint aches, the immediate reaction is often to adjust the bike. Riders adjust saddle height, change stem lengths, or rotate cleats in isolation. These hasty adjustments often transfer mechanical stress to another joint. A bicycle is an adjustable closed kinetic chain. Modifying one contact point directly alters the forces acting on every other joint in the body.
Achieving a sustainable bike position is not about matching an arbitrary visual standard. It is a systematic process of managing mechanical load, accommodating your anatomy, and supporting your specific training demands. Understanding the science of bicycle biomechanics allows you to make informed, cautious adjustments that protect your body over thousands of miles.
A bicycle fit is the systematic evaluation of an athlete's physical characteristics, movement patterns, and performance goals to adjust the bicycle to match their anatomy. The human body interacts with the bicycle through three primary contact areas: the foot and pedal, the pelvis and saddle, and the hands and handlebars. Every force you generate passes through these interfaces. When these points are aligned with your functional range of motion, force transfers smoothly and soft tissues tolerate the sustained workload.
It is critical to view bike fit as a tool for managing tissue stress rather than an absolute shield against injury. Cycling overuse injuries occur when the volume, intensity, or frequency of training exceeds the capacity of muscles, tendons, and joints to recover. A proper fit optimizes joint angles and reduces unnecessary mechanical friction. However, it cannot compensate for erratic training spikes or severe muscular deficits.
A comprehensive 2022 systematic review evaluated dozens of studies on cycling overuse injuries. The researchers found moderate evidence linking total training volume to symptoms. Conversely, they found conflicting or weak evidence connecting traditional, static fit measurements directly to injury rates. A separate 2019 study reached a similar conclusion. The authors observed that while professional fitting was strongly associated with improved comfort and reduced riding pain, having a bike fit did not correlate with lower injury rates over the previous twelve months.
(Note: Visual representation avoided to ensure clean rendering across mobile platforms; principles are fully detailed below.)
These findings explain why two athletes with identical positions can experience entirely different physical outcomes. One rider possesses the tissue capacity and core stability to ride two hundred miles a week without symptoms. The other rider develops patellar tendinopathy on the same setup due to sudden jumps in mileage. A good fit reduces unnecessary mechanical strain. It allows your body to absorb training stress without developing localized hot spots.
When you evaluate your position on the bike, you must look at five distinct questions:
Approaching your setup through this systematic lens prevents reactionary adjustments. It keeps you focused on sustainable mechanics rather than chasing temporary comfort fixes. For comprehensive strategies on balancing mechanical setup with training load, consult our dedicated injury prevention resources.
Saddle position is the foundation of your bike setup. It determines the effective range of motion for your hips, knees, and ankles during every pedal revolution. An incorrect saddle setup alters the muscle recruitment patterns of your quadriceps, glutes, and hamstrings. It also alters the magnitude and direction of joint reaction forces through the lower body.
Saddle height represents the linear distance between the center of the bottom bracket and the top surface of the saddle. Sports medicine practitioners frequently measure dynamic knee flexion at the bottom of the pedal stroke, known as bottom dead center. A classic guideline in sports medicine recommends a dynamic knee flexion angle between 25 and 30 degrees when the pedal is at the six o'clock position. Other cycling biomechanics research demonstrates that healthy, high-performing cyclists often operate within a wider dynamic range of 33 to 43 degrees, depending on the measurement technology and rider intensity.
The variations in published angles highlight why you should not view a single number as a biological absolute. Motion capture systems, dynamic video cameras, and manual goniometers all produce slightly different readings. Furthermore, joint kinematics change as your power output rises. When you produce high wattage or pedal against heavy resistance, your ankles drop and your pelvis stabilizes differently than during an easy warm-up.
A saddle that is set too low forces the knee into excessive flexion throughout the pedal stroke. A study examining recreational cyclists showed that low saddle heights significantly increased the knee extension moment and patellofemoral compressive forces. When the knee remains bent past seventy degrees near the top of the stroke, the patella presses forcefully against the femoral groove. This mechanical pressure is a primary contributor to anterior knee pain and patellar tendinopathy.
Conversely, a saddle that is set too high forces the leg to reach at the bottom of the stroke. The rider compensates by hyperextending the knee, pointing the toes downward, or rocking the pelvis laterally across the saddle. This excessive reach places severe traction on the distal hamstring tendons and the posterior knee capsule. Pelvic rocking also introduces friction across the ischial tuberosities and strains the lumbar spine.
Saddle setback, which is the horizontal position of the saddle relative to the bottom bracket, works directly alongside saddle height. Moving your saddle forward reduces the effective reach to the handlebars and opens the hip angle at the top of the pedal stroke. This forward shift increases the recruitment of the quadriceps and places the knee slightly farther forward relative to the pedal spindle. Moving the saddle rearward shifts your center of mass backward, engaging the gluteal muscles and hamstrings while unloading the hands and wrists.
Many fitters use the traditional Knee Over Pedal Spindle measurement as a baseline setup reference. With the crank arms horizontal at the three o'clock position, a plumb line dropped from the front of the patella should fall roughly through the center of the pedal axle. While this is a practical starting point, extensive reviews confirm that it is not a rigid rule for injury prevention. Setback must ultimately reflect your discipline, your trunk angle, and your pelvic stability under sustained power.
The foot and pedal interface is the only rigid connection between your body and the bicycle. Your foot transmits all muscular force to the drivetrain through a stiff-soled cycling shoe. Small alignment errors at this interface can cause repetitive rotational stress across the ankle, knee, and hip joints over thousands of pedal revolutions.
Cleat position involves four distinct variables: fore and aft alignment, lateral stance width, rotational angle, and angular float. Adjusting any of these variables changes how force travels up the kinetic chain.
The standard starting point for fore and aft cleat position places the pedal spindle between the first and fifth metatarsophalangeal joints. Placing the cleat far forward toward the toes lengthens the lever arm of the foot. This setup increases the mechanical demand on the gastrocnemius, soleus, and Achilles tendon to stabilize the ankle joint under load. Research published in 2023 demonstrated that moving cleats forward significantly alters lower-limb kinematics, including dynamic knee extension angles.
If you suffer from chronic Achilles tendon irritation or calf cramping, moving your cleats rearward toward the heel is often effective. A midfoot or rearward cleat position shortens the lever arm of the foot. This shifts mechanical work away from the calf complex and onto the larger knee and hip extensors. It also stabilizes the heel, reducing the metabolic cost of calf stabilization during long endurance rides.
Angular float refers to the degree of free rotation the pedal allows before releasing the cleat. Fixed cleats with zero degrees of float lock the foot into a rigid orientation. If that orientation does not match the natural anatomical alignment of your lower leg, torsional stress transfers directly into the knee joint. Most endurance cyclists and triathletes benefit from pedals that provide four to nine degrees of free float.
Rotational alignment ensures that the center of the available float matches your foot's natural resting angle. If your feet naturally point outward when standing or walking, your cleats must be rotated to accommodate that external rotation on the bike. Forcing an externally rotated foot into a straight-ahead position strains the lateral structures of the knee, including the iliotibial band.
Stance width, or the lateral distance between your feet, must accommodate your pelvic width and hip anatomy. If your feet are positioned too close together, your knees may flare outward at the top of the pedal stroke or track inward under load. Using pedal washers, adjusting cleat slots laterally, or selecting pedals with longer axles can optimize your frontal-plane knee tracking.
Handlebar setup determines the position of your upper body, the distribution of weight between your pelvis and hands, and the strain placed on your spine. The two primary dimensions of handlebar positioning are reach and drop. Reach is the horizontal distance from the saddle to the handlebar contact point. Drop is the vertical distance from the top of the saddle down to the handlebars.
A classic road cycling position typically produces a torso angle of approximately 40 to 45 degrees relative to the horizontal when riding on the brake hoods. When gripping the drops for sprinting or descending, the torso angle lowers toward 30 to 35 degrees. A balanced setup allows you to keep a slight bend in your elbows without locking your arms or straining your neck to look down the road.
Excessive handlebar reach or drop forces the rider into continuous spinal flexion. To see ahead, the cyclist must hyperextend the cervical spine. This chronic extension pinches the suboccipital musculature and can compress the cervical nerve roots, leading to radiating pain between the shoulder blades. Furthermore, holding an aggressive drop can cause ulnar or median nerve compression in the palms. This leads to numbness in the fourth and fifth fingers, a condition known as handlebar palsy.
For triathletes and time-trial cyclists, the handlebar interface involves aerodynamic extensions and arm rests. An aerodynamic position rotates the entire pelvis forward to lower frontal surface area and minimize aerodynamic drag. While this position significantly reduces air resistance, it closes the anterior hip angle at the top of the pedal stroke. A closed hip angle can pinch the anterior hip structures, decrease power output, and strain the lower back.
The aerodynamic position also has significant consequences for multisport athletes who must run immediately after dismounting. A controlled biomechanical study evaluated the effects of thirty minutes of aerodynamic cycling on subsequent running mechanics in trained triathletes. The researchers found that riding in an aggressive aerodynamic position caused significant changes in sagittal-plane running kinematics. These changes included increased anterior pelvic tilt, reduced hip extension, and altered spinal alignment that persisted for at least fourteen minutes into the run leg.
Triathletes must carefully balance aerodynamic efficiency with run performance. Lowering the aerobar pads to an extreme depth may save a few watts in a wind tunnel. However, if that drop compromises hip extension, your running efficiency off the bike will drop dramatically. Integrating targeted off-bike work from our training and performance guides helps maintain the postural endurance required to sustain an aerodynamic posture without compromising running mechanics.
Human bodies are naturally asymmetrical. Differences in limb length, hip internal rotation, pelvic tilt, and muscular strength are common among healthy athletes. Attempting to force an asymmetrical body into a symmetrical bicycle setup can create severe overuse problems.
Structural leg length discrepancies occur when the femur or tibia bones are physically different lengths. Functional discrepancies occur when pelvic rotations, scoliosis, or muscle imbalances make one leg act shorter than the other during movement. A rider with an unaccommodated leg length discrepancy will often drop one hip downward to reach the pedal at the bottom of the stroke. This pelvic tilt creates uneven pressure across the saddle and subjects the lumbar spine to lateral bending under load.
Before adding shims or cleat wedges, a qualified fitter must assess whether the asymmetry is structural or functional. Functional asymmetries are often best addressed through off-bike mobility and targeted physical therapy. When a genuine structural discrepancy exists, placing a precise shim beneath the cleat of the shorter leg can equalize pelvic stability. However, wedges and shims should never be used as a quick fix for visual knee wobble without a detailed clinical assessment.
Saddle pressure management is equally vital for long-term health. The pelvis supports upper body weight on the saddle primarily through the ischial tuberosities, commonly called the sit bones, and the pubic rami. If a saddle is too narrow, the sit bones overhang the edges, forcing soft perineal tissues to support the rider's weight. This can compress the pudendal nerve and dorsal penile or clitoral nerves, causing genital numbness, pain, and tissue damage.
Saddle tilt plays a critical role in controlling this contact pressure. A level saddle distributes weight evenly across the rear support zone. Tilting the saddle nose downward might temporarily relieve perineal pressure, but it introduces a forward slope. The rider slides forward, placing excessive braking forces on the triceps, shoulders, and wrists. If you experience persistent numbness, perineal pain, or skin breakdown, evaluate your saddle shape, saddle cutout profile, and overall tilt rather than simply dropping the nose.
Adjusting your bicycle modifies how muscular work is distributed across your body. Even when an adjustment moves a joint into an ideal alignment, the surrounding muscles, tendons, and ligaments need time to adapt to the new operating lengths. Changing your position and immediately completing a high-volume or high-intensity workout is a common cause of acute tendon flare-ups.
To introduce fit changes safely, you should use a structured adaptation protocol. Apply changes systematically using small increments, and document your adjustments so you can reverse them if pain develops.
A clinical study investigating 3D kinematic bike fitting demonstrated that significant reductions in riding pain and physical discomfort took weeks to fully manifest, with positive improvements continuing through four months of follow-up. Your neuromuscular system requires several rides to re-pattern its recruitment strategies. What feels slightly foreign during the first twenty minutes may feel natural after three weeks of gradual adaptation.
Keep a detailed log of your mechanical adjustments alongside your daily training notes. If an adjustment produces sharp pain, joint swelling, or numbness that persists after you dismount, stop immediately. Reverse the adjustment and return to your baseline setup before consulting a sports medicine professional. You can read more about structured training adaptations and holistic recovery methods in our recovery and mobility section.
As athletes age past forty and fifty, natural biological changes alter how the body interacts with the bicycle. Intervertebral discs lose hydration, resting muscle elasticity decreases, and the range of motion through the hips and cervical spine gradually narrows. An aggressive, low-profile race fit that served you well in your twenties can cause chronic neck strain and lumbar pain in your fifties.
Masters cyclists frequently experience reduced hamstring and hip flexor extensibility. When hip mobility decreases, the rider cannot tilt the pelvis forward on the saddle without rounding the lumbar spine. If the handlebars are set too low, this excessive lumbar flexion compresses the spine and leads to lower back spasms during long climbs. Raising the handlebars slightly or shortening the stem preserves an open hip angle, allowing you to generate consistent power without placing your back under high shear stress.
Crank length is an effective tool for accommodating joint stiffness in older riders. Traditional bicycles often come equipped with 172.5 or 175-millimeter cranks. Switching to shorter crank arms, such as 165 or 160 millimeters, reduces the circumference of the pedal circle. This smaller circle reduces how high the knee must rise at the top of the pedal stroke, decreasing peak hip and knee flexion. This simple change allows masters cyclists and triathletes to maintain an aerodynamic profile without compressing the hip joint or straining the lower back.
Older connective tissues also remodel more slowly in response to mechanical stress. When making a saddle height or cleat adjustment, masters athletes should allow extra adaptation time between modifications. For in-depth guidance on navigating athletic longevity, explore our comprehensive collection of healthy aging resources.
Even experienced endurance athletes fall into common traps when modifying their positions. Avoiding these frequent mistakes will save you time, money, and unnecessary physical frustration.
The most frequent mistake is modifying multiple components at the same time. If you raise your saddle, slide it back, and install a longer stem on the same afternoon, you cannot determine which change helped or hurt your mechanics. Always make single, isolated changes and evaluate them over several rides before adjusting another component.
Another common error is prioritizing professional race aesthetics over individual functional anatomy. Professional grand tour riders possess exceptional mobility, core stability, and training support that allow them to sustain extreme positions. Copying an aggressive stem slam or an ultra-narrow saddle from a professional will often lead to severe neck, wrist, and back pain. Your bicycle setup must reflect your current range of motion, functional strength, and real-world event duration.
Finally, do not assume that a plush, highly padded saddle solves saddle discomfort. Soft, heavily padded saddles compress beneath your sit bones under load. This allows the dense foam to push directly into the sensitive soft tissues and nerves of the perineum, increasing numbness over long distances. A firm, properly shaped saddle that supports the pelvic bones correctly will protect nerve function and maintain stability far better than soft padding.
Evaluating whether a fit adjustment has succeeded requires both subjective observations and objective data collected over time. Relying solely on how a position feels during the first five minutes on an indoor trainer can be misleading. A position must prove sustainable under race pace, on steep climbs, and across multi-hour training rides.
You should track key metrics across four distinct phases: immediate post-ride sensations, next-morning stiffness, power distribution metrics, and movement efficiency.
Track your left-to-right power balance using dual-sided power meters if you have access to them. While slight power imbalances are normal, a sudden shift from a balanced 50/50 split to a 45/55 split after a fit change suggests one limb is compensating for an unstable interface. Similarly, your ability to sustain a smooth cadence without bouncing in the saddle indicates whether your saddle height provides adequate pelvic stability.
For multisport athletes, monitor your transition run performance. Time how long it takes your running stride to normalize after dismounting the bike. If a new, lower cockpit position causes your first mile off the bike to feel slow, restricted, or painful through the hip flexors, your bike setup is likely too aggressive. For advanced strategies on optimizing endurance performance across multisport disciplines, visit our endurance performance resources.
When your morning joint stiffness drops to zero, your power delivery feels smooth across all terrains, and you can complete long training blocks without numbness, you have found a sustainable fit window.
When to revisit this resource: Review these biomechanical guidelines whenever you purchase a new bicycle, change your shoes or pedal systems, experience unexplained joint pain that persists across three consecutive rides, or transition your training focus from short-course racing to long-distance endurance events.
A scientific approach to bike fitting aligns mechanical precision with biological capacity, allowing you to train consistently, ride comfortably, and sustain your athletic longevity for years to come.

Follow ReEndure for practical insights on endurance training, recovery, nutrition and healthy aging. Stay connected for new articles, research led guidance and ideas to help you perform better for longer.


Read practical ideas on endurance training, recovery, nutrition and healthy aging to keep progressing for years to come.
Read the Blog