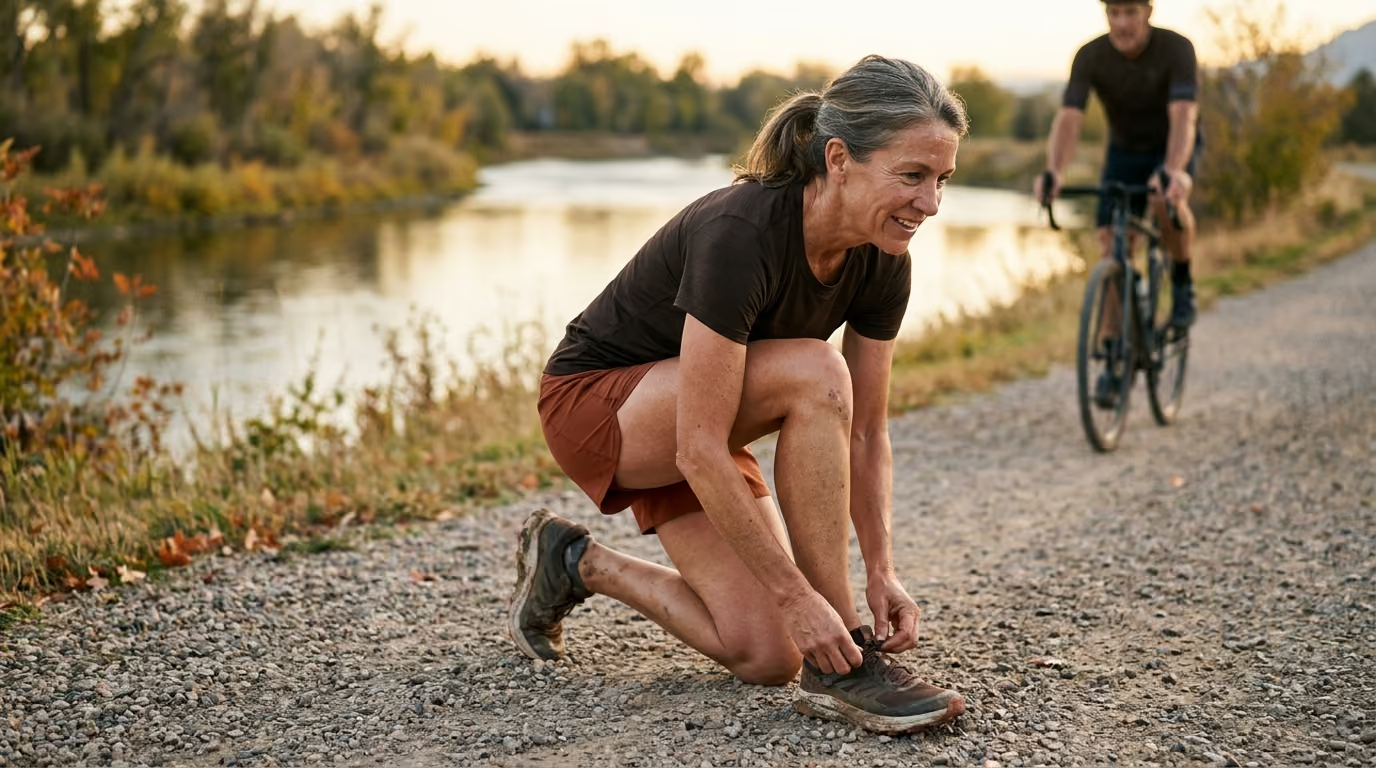

Joint damage is not an unavoidable consequence of endurance sports, as managing training loads and structural capacity keeps your joints pain-free.





You finish a long weekend trail run and step out of the car. Your knee feels stiff, warm, and subtly swollen. A week later, after the discomfort lingers through your morning walks, you visit an imaging clinic. The radiologist points to a dark gap on the X-ray and mentions mild osteoarthritis, joint space narrowing, and minor cartilage thinning.
For an endurance athlete, this moment can feel like a career-ending verdict. The immediate advice from well-meaning friends or general practitioners is often predictable: stop running, sell the bike, avoid hills, and take up swimming. You are left wondering if decades of logging miles have ruined your joints.
The reality of joint biology is far more encouraging. Joint health is not a finite bank account that you deplete with every footstrike or pedal stroke. Cartilage is living tissue that responds, adapts, and thrives under cyclical mechanical stress when that stress matches your current capacity.
Navigating joint health over a lifetime of endurance sport requires a clear framework. By understanding how tissue capacity, strength training, movement control, and load management interact, you can continue training for decades. With the right adjustments, you can pursue meaningful athletic goals while protecting your physical longevity.
Joints are dynamic, living biological structures. A synovial joint consists of articular cartilage, subchondral bone, the synovial membrane, joint capsule, ligaments, tendons, and the muscles that cross it. Articular cartilage has no direct blood supply or nerve endings. It relies entirely on the diffusion of nutrients from synovial fluid, a process driven directly by joint movement and mechanical compression.
When you walk, run, or ride, cartilage undergoes cyclical loading. During the compression phase, fluid expels waste products from the cartilage matrix. As the load releases, the tissue draws in nutrient-rich synovial fluid. Far from wearing down the joint like a car tire, regular and moderate mechanical loading helps maintain cartilage thickness, proteoglycan content, and tissue resilience.
To understand your joint health, you must separate three distinct concepts that are often conflated:
These are anatomical changes visible on an X-ray or MRI. They include cartilage thinning, osteophytes (bone spurs), subchondral sclerosis, or joint space narrowing. Structural changes are common in active adults over forty and do not reliably predict how much pain you feel or how far you can run.
This is the personal experience of pain, stiffness, aching, warmth, or perceived instability. Symptoms fluctuate based on daily fatigue, sleep quality, stress, systemic inflammation, and recent training loads.
This is what you can actually do in daily life and training. It measures whether you can run five miles, climb three flights of stairs, hold a tuck on your time-trial bike, or complete a mountain hike.
Many endurance athletes have noticeable structural changes on imaging but perform at a high level with zero symptoms. Conversely, an athlete with pristine joint space might experience severe joint pain due to localized inflammation or acute overload. Current clinical guidelines, including those from the National Institute for Health and Care Excellence (NICE), advise that osteoarthritis management should focus on symptoms and physical function rather than imaging results alone.
According to data from the Centers for Disease Control and Prevention (CDC), osteoarthritis affects approximately 33 million adults in the United States. It is a whole-person, load-sensitive condition influenced by age, body mass, previous traumatic injury, family history, muscle strength, and recovery status. It is not simply the inevitable consequence of logging miles.
Research on endurance runners consistently supports this view. A systematic review published by Alentorn-Geli and colleagues analyzed joint health across multiple cohorts. They found that recreational runners had an osteoarthritis prevalence of just 3.5 percent in the hip and knee. In contrast, sedentary non-runners had an osteoarthritis prevalence of 10.2 percent.
The risk picture changes for competitive and elite athletes, who showed an osteoarthritis prevalence of 13.3 percent in the same meta-analysis. This elevated risk in elite populations is driven by several factors. Elite athletes endure decades of extreme training volumes, frequent high-intensity intervals, and a history of competing through severe pain. They also have higher rates of traumatic joint injuries and fewer opportunities for recovery.
For the everyday athlete, recreational running and endurance sports within reasonable boundaries do not destroy joints. A study of marathon runners found that cumulative running history was not associated with arthritis risk. Instead, age, body mass index, family history, and previous joint surgery were the primary risk factors. To build a sustainable athletic life, explore evidence-based strategies for healthy aging that support lifelong performance.
Joint health is a continuous balance between capacity and load. Capacity represents the maximum amount of mechanical stress that your muscles, tendons, bones, and cartilage can handle without sustaining excessive irritation. Load is the total physical and psychological stress placed upon those tissues.
When your applied load remains within your envelope of capacity, tissues adapt and remain healthy. When applied load exceeds capacity across multiple sessions, the joint becomes irritated. This leads to persistent aching, morning stiffness, and reactive swelling.
External load consists of the physical work you perform during training. It includes several distinct components:
Internal load reflects how your body perceives and responds to external stress. It includes subjective ratings of perceived exertion, muscle soreness, sleep quantity, life stress, and nutritional status. Two athletes running the exact same five-mile workout at an eight-minute pace will experience entirely different internal loads if one is well-rested and the other is sleep-deprived.
Popular running media often promotes the ten percent rule, which suggests never increasing weekly mileage by more than ten percent. However, modern sports science literature cautions against relying on fixed numerical workload ratios to prevent injuries. Load tolerance is far more complex than simple mileage tallies. An athlete can keep their mileage identical while doubling their downhill running volume, drastically increasing mechanical joint stress without altering overall distance.
To manage training loads, you should monitor joint irritability. Irritability reflects how easily symptoms are triggered and how long they persist afterward. A low-irritability joint might experience mild stiffness during the first five minutes of a run that disappears quickly. A high-irritability joint may flare up after fifteen minutes of easy movement and remain swollen, hot, and painful for thirty-six hours.
Athletes can use a simple traffic-light system to assess joint response and adjust their training safely:
Symptoms during exercise are minimal or nonexistent, rating between zero and two on a ten-point scale. Movement mechanics remain smooth and natural without limping or compensating. Any mild morning stiffness clears within fifteen to twenty minutes of waking, and there is no joint swelling.
Action: Maintain your current training plan and progress training loads gradually.
Symptoms increase slightly during training, reaching a three or four on a ten-point scale, but remain tolerable. Morning stiffness lasts longer than thirty minutes, or the joint aches for several hours after your session. You notice slight changes in your running gait or pedal stroke late in workouts.
Action: Modify your training immediately. Reduce volume, remove downhill segments, lower your intensity, or substitute non-impact cross-training until symptoms settle into the green zone.
Pain is sharp or severe, exceeding a five on a ten-point scale, and worsens as the workout progresses. You develop an obvious limp or actively avoid loading the affected limb. The joint exhibits visible swelling, heat, giving way, or mechanical locking.
Action: Stop aggravating activities immediately. Do not attempt to push through red-zone symptoms. Seek an evaluation from a physical therapist or sports physician to identify the underlying issue.
Pain during or after exercise does not automatically indicate that cartilage is tearing. The NICE guidelines state that joint discomfort can temporarily increase when starting a new exercise program. However, persistent swelling, joint instability, or pain that forces you to alter your gait indicates that you have exceeded your joint's current capacity. Review our comprehensive injury prevention frameworks to learn how to keep your training within sustainable limits.
Strength training is the single most effective intervention for increasing joint capacity. Muscles serve as active shock absorbers for the skeletal system. When your quadriceps, hamstrings, gluteal muscles, and calves are strong, they absorb and disperse ground reaction forces before those loads reach your cartilage and subchondral bone.
The American College of Rheumatology and the Arthritis Foundation strongly recommend exercise for hip and knee osteoarthritis. While no single exercise is universally superior, an effective endurance program targets five essential movement patterns:
Knee-dominant exercises build the quadriceps, which directly control patellofemoral and tibiofemoral joint stress.
Hip-dominant movements strengthen the gluteus maximus, hamstrings, and deep hip stabilizers. These muscles manage pelvic stability and reduce twisting forces at the knee.
The calf complex and foot intrinsics absorb immense loads during running and hiking. A weak calf complex shifts excessive braking forces upward into the knee joint.
Endurance sports occur primarily in the sagittal plane (forward movement). However, joint breakdown often stems from poor control in the frontal and rotational planes.
When a joint is too sensitive for full-range dynamic lifting, isometric holds provide an effective way to maintain muscle tone and relieve pain.
Endurance athletes should complete two focused strength sessions per week, lasting thirty to forty-five minutes. Focus on progressive overload by gradually increasing resistance, repetitions, or movement control. Avoid scheduling heavy lower-body strength workouts immediately before demanding endurance sessions. To support tissue repair between sessions, follow practical recovery and mobility principles.
Mobility is the ability to actively control and access a joint range of motion under load. It differs fundamentally from passive flexibility, which simply measures how far an external force can stretch a muscle.
Endurance athletes do not require extreme contortionist flexibility. However, they need sufficient functional mobility so their bodies do not compensate by overloading adjacent structures. When an ankle joint cannot bend, the knee is forced to absorb abnormal rotational torque. When a hip cannot extend, the lumbar spine arches excessively to compensate.
Athletes should prioritize four key mobility regions:
Adequate ankle dorsiflexion allows the shin to travel forward over the foot during mid-stance. Limited ankle mobility forces the foot to overpronate, increasing inward rotation of the tibia and stressing the medial knee compartment.
Running and striding require the trailing leg to move behind your pelvis. Tight hip flexors restrict natural hip extension, forcing the athlete to overstride out front or overextend their lower back.
Cycling and trail running require adequate hip rotation to accommodate pedal strokes and uneven surfaces. Restricted hip rotation places excessive lateral stress on the knee joint.
A stiff mid-back creates a hunched posture on the bike or during long runs, compromising breathing mechanics and altering pelvic alignment.
Passive stretching, foam rolling, and kinesiology taping provide short-term symptom relief, but they do not prevent long-term overuse injuries. Use mobility drills to unlock necessary movement patterns, then immediately reinforce that new range with active strength exercises.
The NICE guidelines recommend manual therapy only as an adjunct alongside active therapeutic exercise. Passive therapies cannot replace active strength and movement training.
Footwear and gear adjustments help manage joint loads, although they cannot compensate for poor training habits. The primary goal of footwear is to optimize comfort, match your movement mechanics, and disperse repetitive impact forces.
When selecting footwear, use the comfort filter. Research indicates that shoes feeling naturally comfortable and supportive tend to correlate with lower movement fatigue. Avoid radical shifts in shoe designs, such as jumping abruptly from a traditional twelve-millimeter heel-to-toe drop to a zero-drop shoe. Significant footwear changes redistribute mechanical loads across different tissues, shifting stress from the knee to the Achilles tendon and calf complex.
Foot orthoses are another valuable tool for managing symptoms. A systematic review published in 2022 by Bonanno and colleagues evaluated twelve studies covering over 5,000 runners. The authors found that foot orthoses were associated with a lower risk of lower-limb injuries compared to controls, with a risk ratio of 0.6.
A subsequent review noted that orthoses provide both immediate and sustained reductions in pain for symptomatic runners. These benefits are most pronounced when orthoses are integrated into a comprehensive rehabilitation plan rather than used as a standalone cure.
Orthoses are most effective under specific conditions:
For cyclists, bike fitting plays an essential role in joint preservation. A saddle set too low or too far forward increases knee flexion angles, dramatically elevating compressive loads on the patellofemoral joint. A saddle set too high forces the knee to hyperextend at the bottom of the pedal stroke, irritating the posterior joint capsule and hamstrings. Cyclists experiencing anterior knee pain should slightly increase their cadence and use easier gears to reduce pedal torque on steep climbs.
For hikers and trail runners, trekking poles are an effective way to offload lower-body joints. Using poles on descents redistributes braking forces to the upper body and arms, reducing compressive forces on the knees and hips by fifteen to twenty percent.
An osteoarthritis diagnosis does not mean your days of endurance training are over. Clinical practice guidelines from the American College of Rheumatology, the Arthritis Foundation, and NICE agree that therapeutic exercise is the first-line treatment for managing joint arthritis.
Exercise increases joint lubrication, maintains muscle mass, improves bone density, and triggers the release of anti-inflammatory cytokines. Systematic reviews examining runners with established knee osteoarthritis demonstrate that running does not accelerate radiographic disease progression or worsen patient-reported outcomes over the short term. Running can even help manage generalized joint discomfort.
Athletes managing osteoarthritis should implement four proven strategies:
When joint irritability limits your impact tolerance, replace a portion of your running volume with low-impact aerobic modalities.
For athletes with unicompartmental knee osteoarthritis, a custom tibiofemoral unloader brace can provide significant pain relief. These braces apply a gentle corrective force to open up the narrowed compartment of the knee joint. This redistributes load across the healthier side of the joint and helps restore a normal walking gait.
Topical nonsteroidal anti-inflammatory drugs (NSAIDs) provide localized symptom relief for knee osteoarthritis with fewer systemic side effects than oral medications. Intra-articular glucocorticoid injections can help quiet a severe joint flare, but they should be used sparingly under medical supervision.
Never use pain-relieving medications to mask acute joint pain before a demanding workout. Suppressing pain signals while subjecting a joint to high training loads can lead to accidental tissue overload and accelerate joint irritation.
Body mass influences joint loading because ground reaction forces multiply body weight with every step. NICE guidelines note that moderate weight reduction can significantly reduce joint pain and improve physical function in overweight individuals.
However, endurance athletes must approach weight management carefully. Restrictive dieting increases the risk of low energy availability, hormonal dysfunction, bone stress injuries, and impaired tissue recovery. Focus on fueling your body with nutrient-dense foods, adequate protein, and sufficient carbohydrates rather than pursuing extreme weight loss. Explore balanced nutrition and fueling strategies to support your training demands.
When a joint flares up, your goal is to preserve training continuity without repeatedly irritating the sensitive joint structure. Instead of abandoning your athletic goals, modify the specific training variables that trigger your symptoms.
Follow this six-stage return-to-load framework to navigate joint flare-ups safely:
Identify and eliminate the specific movement causing the flare, such as steep downhills, interval training, or heavy pack carries. Keep moving with pain-free daily activities and gentle range of motion exercises.
Ensure you can walk smoothly without a limp, negotiate stairs comfortably, and stand on one leg with stability. Perform isometric holds like wall sits to maintain muscle activation without irritating joint surfaces.
Begin structured, progressive strength training using comfortable ranges of motion. Accumulate aerobic training volume using low-impact cross-training modalities like swimming, pool running, or cycling.
Return to easy, controlled sport-specific movement. For runners, this means short, flat run-walk intervals on forgiving surfaces like packed dirt or synthetic tracks. For cyclists, start with flat, low-torque spins. For hikers, walk on gradual grades with an empty pack.
Gradually introduce challenging variables back into your training, changing only one variable at a time. Add moderate rolling hills, increase your workout duration, or pick up your pace. Avoid introducing both speed and steep hills in the same session.
Resume your structured training plan, including long runs, technical trail descents, high-power cycling efforts, or multi-day hiking expeditions. Monitor your 24-hour symptom response carefully after every hard effort.
To see how these principles apply in practice, consider these common athlete scenarios:
A 54-year-old marathoner with mild radiographic knee osteoarthritis develops pain during the final miles of long runs with significant downhill elevation.
A 46-year-old cyclist increases their hill-climbing volume and develops persistent aching around the patella after hard rides.
A 50-year-old hiker feels fine ascending mountain trails but suffers from acute knee pain when descending with a thirty-pound pack.
To fine-tune your weekly routines, explore our structured training and performance protocols.
As we pass forty and fifty, our musculoskeletal system undergoes predictable biological shifts. Articular cartilage loses water content and proteoglycans, making it slightly less compliant under impact. Tendons become stiffer and collagen synthesis slows down, extending the time needed to repair microdamage between hard workouts.
Sarcopenia, the age-related loss of muscle mass and fast-twitch muscle fibers, also accelerates without dedicated resistance training. When muscle mass declines, joints absorb a higher proportion of every impact force.
Masters endurance athletes can thrive by making a few simple programming adjustments:
Even experienced endurance athletes fall into predictable traps when managing joint health. Avoid these common mistakes:
Stopping all activity because an X-ray shows joint space narrowing or bone spurs is unnecessary and counterproductive. Inactivity causes muscle atrophy, weakens bone density, and dehydrates cartilage, worsening long-term joint health.
While mild discomfort is acceptable, running through joint swelling, warmth, or a noticeable limp is a mistake. Swelling inhibits the surrounding muscles through arthrogenic muscle inhibition, preventing them from firing properly and leaving your joint vulnerable to overloading.
Massage, foam rolling, acupuncture, and adjustments can feel good, but they do not build tissue capacity. Long-term joint resilience requires progressive strength, movement control, and smart load management.
Switching abruptly to minimalist footwear, doubling your downhill running volume, or moving your bike cleats overnight places unfamiliar stresses on your joints. Introduce gear and biomechanical changes gradually.
Taking NSAIDs or analgesics to complete a challenging workout masks essential pain signals. This makes it impossible to judge your true joint capacity, increasing the risk of joint irritation and tissue overload.
Evaluating joint health requires objective tracking over time. Use these practical metrics to ensure your training remains sustainable:
Track how your joint feels the morning after a workout rather than judging joint health purely during the session. If morning stiffness resolves within twenty minutes and the joint shows no swelling, your body handled the previous day's load well.
Track your progress on key single-leg strength and stability tests every four to six weeks:
Record your weekly mileage, elevation gain and loss, average cycling cadence, and strength training volume alongside a subjective joint comfort score. Over time, you will identify your personal thresholds for volume, speed, and hill work. This helps you plan future training blocks that preserve your joint health.
When to revisit this resource: Review this guide whenever you experience a joint symptom flare, before transitioning to a new training phase, or when planning a return to competition after time away.
Preserving your joint health does not mean giving up the sports you love. By building strong muscles, respecting your body's recovery needs, and adjusting your training thoughtfully, you can continue running, riding, and hiking with confidence for years to come.

Follow ReEndure for practical insights on endurance training, recovery, nutrition and healthy aging. Stay connected for new articles, research led guidance and ideas to help you perform better for longer.


Read practical ideas on endurance training, recovery, nutrition and healthy aging to keep progressing for years to come.
Read the Blog